
Membership


Moonah Links Golfer Classic 21st August 2026
WINTER SALE! 18 Holes for TWO with Motorised Carts at the Home of Australian golf, Moonah Links!
WINTER SALE! 18 Holes for FOUR with Motorised Carts at the home of Australian Golf, Moonah Links!
Moonah Links is considered one of Australia’s most unique leisure resorts combining two 18 hole championship golf courses, a la carte restaurant, onsite dayspa and luxury accommodation. With panoramic views from raised tees, shared greens and a host of other unique features this course will fast become a must play for all serious golfers.
Conveniently located between one of Victoria’s most popular award winning attractions, the Peninsula Hot Springs and neighbouring Cups Estate Winery & St Andrews Beach Brewery, one does not need to venture far from the resort to experience the very best that the Mornington Peninsula has to offer.
Opened in 2004, the Ross Perrett designed Legends course offers a contrasting experience to the adjoining Open layout. The course pays homage to past Australian Open champions, with each hole named after a significant winner.
A feature of the Legends Course is the wild bunkering that, along with the native Moonah Trees, fit with Perrett's intention to carve the golf course out of the natural flow of the land.
This true links-style course offers a variety of challenging holes that require contrasting strategies to play them well. The Legends Course is considered more forgiving of the two, the generous fairways create an accessible layout for golfers of all ages and abilities.

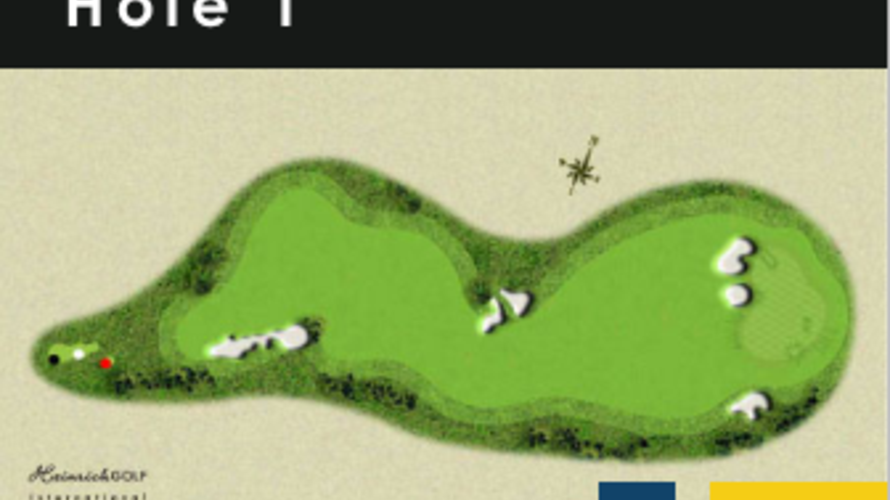
Aaron Baddley (VIC)
A reachable in 2 par five that entices the longer hitters to take on the corner, a carry of over 200 meters. A raised green will punish the short approach with a fast green sloping from left to right
Steve Elkington (NSW)
A short par four best played conservatively. A wayward drive can easily find trouble on both sides. A straight drive will leave a short iron to the raised green.
Tom Watson (USA)
Ensure you have enough clubs to avoid the sandy wasteland below. This hole often plays straight into the wind so good club selection is essential.
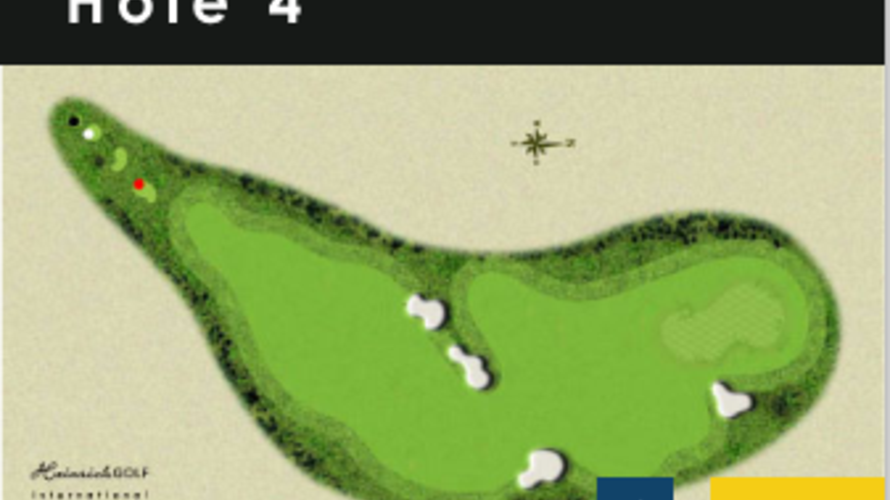
Greg Norman (QLD)
The most exciting tee shot on the peninsula, hitting out onto a fairway some 40 meters below. A tee shot to the corner will allow for an easy approach; however there is peril in hitting long.
David Graham (NSW)
A medium length par 3 can be deceiving in length, playing longer that initial thought. With trouble on both sides an accurate tee shot is required; anything short of the green will encounter difficulty.
Arnold Palmer (USA)
After a tee shot to the corner, the hole veers to the left. Longer hitters can attack the large double green which is easily reachable in two. Shorter players can lay up short and have a easy approach to the green.
Jack Nicklaus (USA)
Looking more formidable than actually is, the drive over the bunkers into the valley positions for the best approach. A two tiered green makes for difficult putting.
Kel Nagle (NSW)
A tough driving hole with bunkers impeding from both sides. Again with a double tiered green making putting difficult.
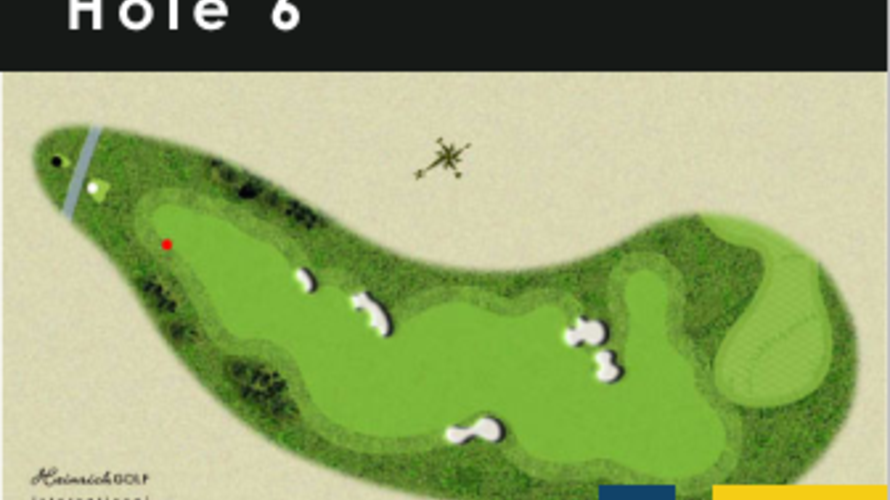
Gary Player (RSA)
A long hole that can be troublesome when the wind strengthens, with trouble down both sides of the fairway. The second shot is best left 50 to 60 meters short of the green. The large green is also tough as there is trouble behind.
Bruce Crampton (NSW)
A seemingly easy par three can be challenging with club selection. The amount of wind plays a crucial factor in club selection.
Bobby Locke (RSA)
A short par four reachable for the long hitters. With trouble down the right side the percentage play is to lay up with long iron to allow for easy approach to a relatively flat green.
Peter Thomson (VIC)
A challenging hole with a blind green. Longer hitters can easily reach the green in two. The green feeds from the down slope of the fairway. The green is fairly large and has a few undulations.
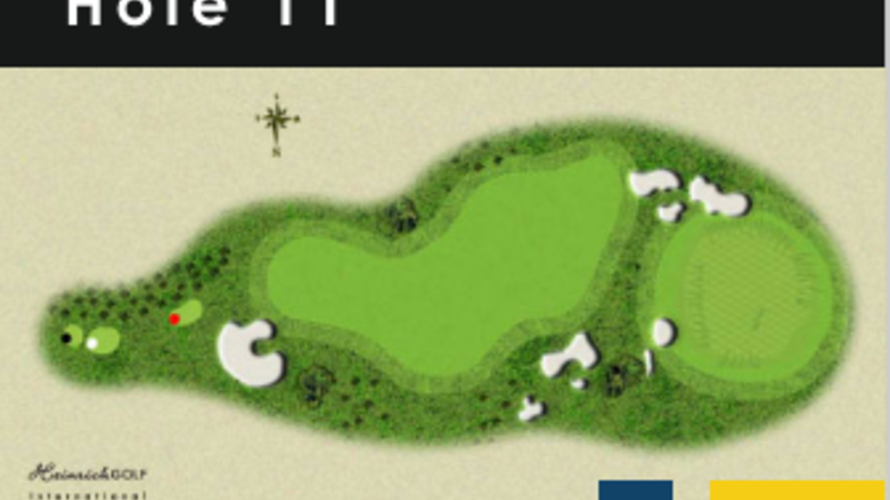
Norman Von Nida (QLD)
The hardest hole on the course requires a blind tee shot followed by a long second into a green decorated by the surrounding sand dune. Club selection is essential or can make for extremely long putts.
Ossie Pickworth (NSW)
Another strong par four with the tough shot being the approach, anything to the right can encounter trouble. A double tiered green again makes putting challenging.
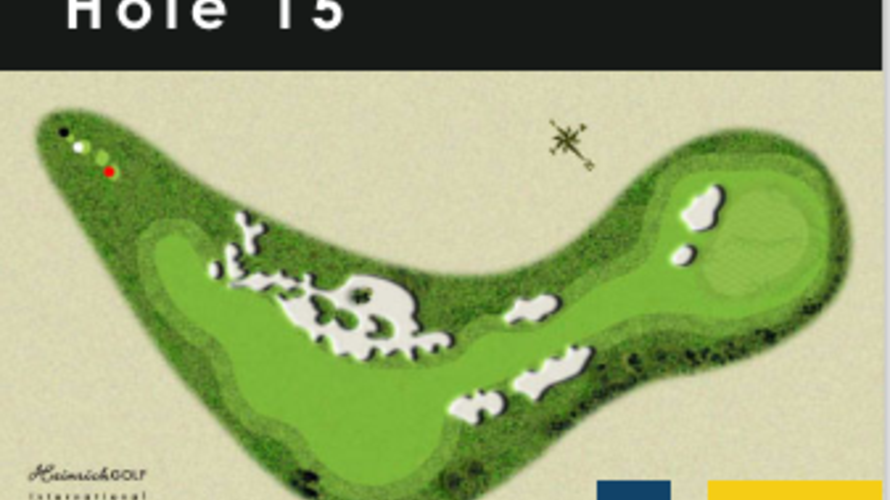
Jim Ferrier (NSW)
A unique par four that requires much thought, usually an iron tee shot to the corner allows for a mid iron approach to a raised green.
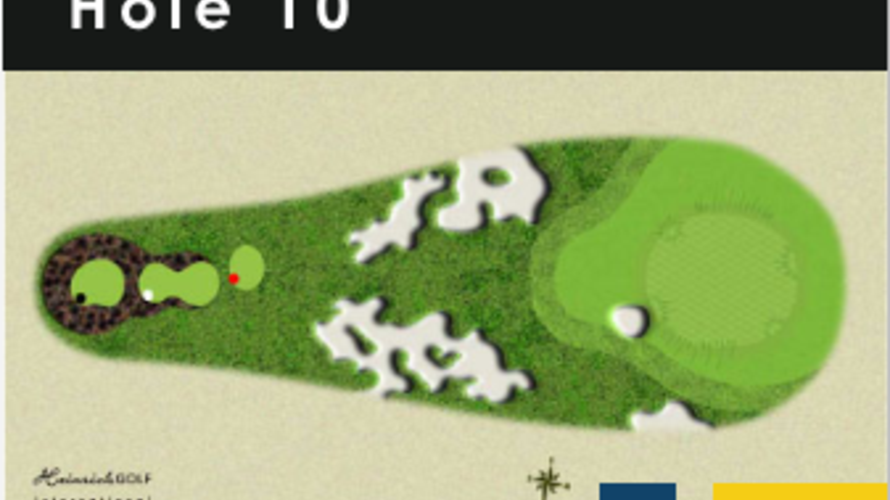
Gene Sarazen (USA)
The largest green in the southern hemisphere, the hole is dictated by pin position.
Ivo Whitton (VIC)
A tee shot down the right side will feed into the ideal approach position. A raised green with bunkers on bother sides demands a precise approach.
Michael Scott (VIC)
A wide fairway allows for an easy tee shot, strategically placed fairway bunkers may cause some trouble. A mid to long iron approach into a green that slopes from left to right sets up for the perfect finish.


